[NestJS] 파일 업로드 구현하다 FileInterceptor 를 커스텀 한 사람이 있다?
Ghostpong 에서는 유저의 프로필 사진 업로드 기능을 지원하고 있습니다. 서버에 직접 static file 들을 업로드하고 serving 하는 기능을 구현했던 과정을 소개합니다.
1. serve static
https://docs.nestjs.com/recipes/serve-static
Documentation | NestJS - A progressive Node.js framework
Nest is a framework for building efficient, scalable Node.js server-side applications. It uses progressive JavaScript, is built with TypeScript and combines elements of OOP (Object Oriented Programming), FP (Functional Programming), and FRP (Functional Rea
docs.nestjs.com
Nest 문서가 너무 잘 되어있어서 5초만에 따라할 수 있습니다.
yarn add @nestjs/serve-static패키지 설치 후 AppModule 에 ServeStaticModule 을 설정해주면 됩니다.
app.module.ts
@Module({
  imports: [
	...
    ServeStaticModule.forRoot({
      rootPath: join(__dirname, '..', '..', '..', 'public'),
      renderPath: '/img',
      serveStaticOptions: { index: false, redirect: false },
    }),
    ...
  ],
})
https://github.com/nestjs/serve-static/blob/master/lib/interfaces/serve-static-options.interface.ts
여기서 옵션을 참고하여 작성했습니다.
static file 이 이미지 파일 뿐이었기 때문에 directory 로 요청이 오면 index.html 을 보여주는 index 와 path 가 directory 이면 '/' 을 붙여주는 redirect 설정은 false 로 설정했습니다.
2. file upload
https://docs.nestjs.com/techniques/file-upload#basic-example
Documentation | NestJS - A progressive Node.js framework
Nest is a framework for building efficient, scalable Node.js server-side applications. It uses progressive JavaScript, is built with TypeScript and combines elements of OOP (Object Oriented Programming), FP (Functional Programming), and FRP (Functional Rea
docs.nestjs.com
nest 는 express 패키지인 multer 를 사용해서 multipart/form-data 로 오는 파일을 처리합니다. multer 는 multipart/form-data 에서 지원하지 않는 형식의 데이터는 처리할 수 없습니다.
이미지 업로드하려면 request body 에 string 으로 담아줘야하는데 이거 format 이 multipart/formdata 임
https://www.rfc-editor.org/rfc/rfc7578.html
RFC 7578: Returning Values from Forms: multipart/form-data
www.rfc-editor.org
단일 파일을 업로드하려면 FileInterceptor() 인터셉터를 라우트 핸들러에 연결하고 @UploadedFile() 데코레이터를 사용하여 request에서 파일을 추출하기만 하면 됩니다.
@Post('image')
@UseInterceptors(FileInterceptor('image'))
uploadImage(@UploadedFile() file: Express.Multer.File) {
	...
}
@UploadedFile
라우트 핸들러 매개변수 데코레이터로 file object 를 추출하고 데코레이터가 달린 매개변수에 추출한 파일을 넣어줍니다. Express 기반 애플리케이션을 위한 다중 미들웨어와 함께 사용됩니다.
FileInterceptor
두 가지 인자를 받습니다.
- fieldName: HTML form 에서 파일을 hold 할 이름 -> client 에서
multipart/form-data형태로 파일을 보내줄 때 name 을 해당 인자로 설정해줘야 합니다. - options : MulterOptions 타입의 옵셔널 오브젝트. multer constructor 에서 쓰이는 것과 동일함.
주의 : 파이어베이스같은 써드파티와 호환이 안될 수도 있음
File validation
파일 크기나 mime type 을 체크하는 유효성 검사를 위해서는 pipe 를 만들어서 UploadedFile 데코레이터에 바인딩하면 됩니다.
@nestjs/common 에서 file validation 을 위한 내장 파이프 (ParseFilePipe) 도 제공하고 있습니다.
ParseFilePipe
validators 인자에 FileValidator 타입의 validator 를 여러 개 설정해서 사용할 수 있습니다.
@Post('file')
uploadFileAndPassValidation(
  @Body() body: SampleDto,
  @UploadedFile(
    new ParseFilePipe({
      validators: [
        // ... Set of file validator instances here
      ]
    })
  )
  file: Express.Multer.File,
) { ... };
}
validators 외에 다음 추가 옵션도 설정할 수 있습니다. (optional)
errorHttpStatusCode: 모든 validator fail 시 throw 될 HTTP 상태코드 (기본 400)exceptionFactory: 에러메세지를 만들고 에러 리턴할 Factory
FileValidator 는 커스텀으로 만들 수도 있고, 빌트인으로 제공되는 것을 사용해도 됩니다.
커스텀하려면 다음 형태로 만들 수 있습니다.
export abstract class FileValidator<TValidationOptions = Record<string, any>> {
  constructor(protected readonly validationOptions: TValidationOptions) {}

  /**
   * Indicates if this file should be considered valid, according to the options passed in the constructor.
   * @param file the file from the request object
   */
  abstract isValid(file?: any): boolean | Promise<boolean>;

  /**
   * Builds an error message in case the validation fails.
   * @param file the file from the request object
   */
  abstract buildErrorMessage(file: any): string;
}
isValid 에서는 비동기 validation 도 지원합니다. file 을 Express.Multer.File 타입으로 지정해서 타입안정성도 보장할 수 있습니다.
빌트인으로 제공되는 FileValidator 는 두 가지가 있습니다.
MaxFileSizeValidator: 파일 사이즈가 주어진 값 (byte) 보다 작은지 체크FileTypeValidator: 주어진 값과 매치되는 마임타입인지 체크
File validation 을 ParseFilePipe 로 하는 경우 다음과 같이 사용할 수 있습니다.
@UploadedFile(
  new ParseFilePipe({
    validators: [
      new MaxFileSizeValidator({ maxSize: MAX_IMAGE_SIZE }),
      new FileTypeValidator({ fileType: /image\\/(png|jpeg|gif)/ }),
    ],
  }),
)
MAX_IMAGE_SIZE 보다 큰 파일이나 image/png, image/jpeg, image/gif 형태가 아니면 400 에러코드를 리턴합니다.
ParseFilePIpeBuilder
builder 를 이용해서 validator 객체를 생성하지 않고 설정할 수도 있습니다.
@UploadedFile(
  new ParseFilePipeBuilder()
    .addFileTypeValidator({
      fileType: 'jpeg',
    })
    .addMaxSizeValidator({
      maxSize: 1000
    })
    .build({
      errorHttpStatusCode: HttpStatus.UNPROCESSABLE_ENTITY
    }),
)
file: Express.Multer.File,
저는 단일 파일 처리만 구현했지만 다중 파일 업로드도 가능하니 공식 문서를 참조하시면 됩니다.
https://docs.nestjs.com/techniques/file-upload#array-of-files
Documentation | NestJS - A progressive Node.js framework
Nest is a framework for building efficient, scalable Node.js server-side applications. It uses progressive JavaScript, is built with TypeScript and combines elements of OOP (Object Oriented Programming), FP (Functional Programming), and FRP (Functional Rea
docs.nestjs.com
Validation 하는 위치에 대한 고민
업로드할 파일의 limit, MIME type 을 체크해야 했는데, option을 넘겨서 multer 에서 직접할 수도 있고 nest의 ParseFilePipe 에서도 할 수 있었기 때문에 고민이 되었습니다. pipe 의 역할을 생각해보면 pipe가 맞았지만 multer 기능을 (FileInterceptor) 놔두고 굳이 인터셉터보다 뒤에 실행되는 파이프에서...? 하는 생각이 들었습니다.
고민하던 와중 확실히 인터셉터로 정한 계기가 생겼습니다.
파일 저장 api 에서 사용하던 FileInterceptor 의 코드입니다.
@UseInterceptors(
  FileInterceptor('image', {
    fileFilter: (req, file, cb) => {
      if (!file.mimetype.match(/image\/(gif|jpeg|png)/)) {
        cb(new UnsupportedMediaTypeException('gif, jpeg, png 형식의 파일만 업로드 가능합니다.'), false);
      }
      if (file.size > MAX_IMAGE_SIZE) {
        cb(new PayloadTooLargeException('이미지 파일은 4MB 이하로 업로드 가능합니다.'), false);
      }
      cb(null, true);
    },
    storage: diskStorage({
      destination: 'public/asset',
      filename: (req, file, cb) => {
        // FIXME : auth guard 적용 후 req.user.id로 변경
        const myId = req.headers['x-my-id'];
        const extArray = file.mimetype.split('/');
        cb(null, 'profile-' + myId + '.' + extArray[extArray.length - 1]);
      },
     }),
  }),
 )
storage 옵션을 통해 파일을 저장하는데 만약 fileFilter 에서 적용하는 파일 validation 부분이 ParseFilePipe 에서 적용된다면 nest 의 생명 주기에 따라 전위 인터셉터 -> 파이프 순으로 실행되기 때문에 파일이 먼저 생성되고 validation 이 이루어집니다.
그러면 따로 pipe 에서 unlink 를 실행해야 합니다. 정말..... 아름답지 않습니다....................
아니면 데이터 상에 multer 에서 읽은 file 을 저장해놨다가 pipe 에서 save 하는 방법도 있을 듯 합니다만 이것도....아름답지 않습니다.............
테스트로 Ghostpong 에서 지원하지 않는 sql 형식의 파일을 업로드 해 봤습니다.
와! 정말 생각한대로 되었습니다.
그래서 pipe 는 버리고 FileInterceptor 로만 구현하게 되었습니다.
그러나..
재앙의 시작
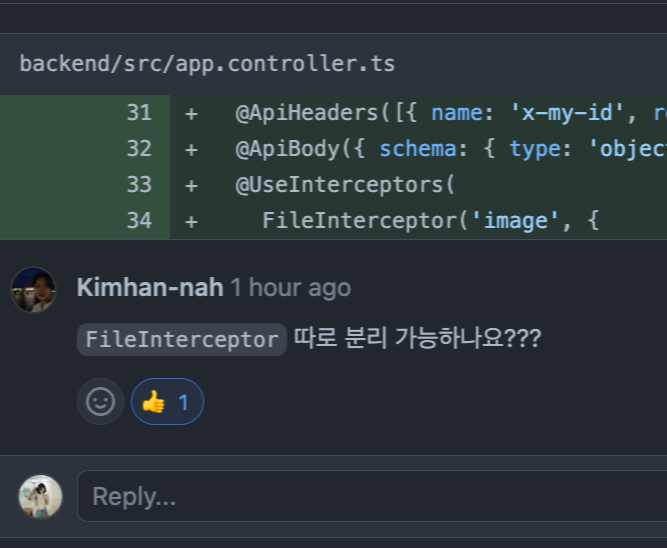
controller 에 decorator 로 너무 많은 코드가 들어가버린 나머지 동료분이 분리를 요청해주셨습니다.
저도 썩 마음에 들지 않았기 때문에 아름답지 않습니다 리팩토링을 진행하게 되었습니다.
분리를 위해 FileInterceptor 코드를 따로 작성하여 제가 직접 multer 를 연결하기로 했습니다.
FileInterceptor 는 사실상 multer 를 nest 의 Interceptor 로 감싼 형태기 때문에 리팩토링이 쉽진 않았습니다. 이 글은 10월에 적고 있지만 4월에 겪은 고난이라 힘들었다는 것 밖에 기억이 안나는 게 아쉽습니다. 좀 더 생생하게 기록해둬야 했는데..
근데 지금 생각해보니까 그냥 FileInterceptor 를 상속받아서 옵션만 넘기거나 했어도 될 것 같네요.. 아니면 multer 옵션만 다른 파일에 저장하는 방법도 있었을 것 같습니다.
FileInterceptor 구현
Nest 에서 제공하는 FileInterceptor 코드입니다.
export function FileInterceptor(
  fieldName: string,
  localOptions?: MulterOptions,
): Type<NestInterceptor> {
  class MixinInterceptor implements NestInterceptor {
    protected multer: MulterInstance;

    constructor(
      @Optional()
      @Inject(MULTER_MODULE_OPTIONS)
      options: MulterModuleOptions = {},
    ) {
      this.multer = (multer as any)({
        ...options,
        ...localOptions,
      });
    }

    async intercept(
      context: ExecutionContext,
      next: CallHandler,
    ): Promise<Observable<any>> {
      const ctx = context.switchToHttp();

      await new Promise<void>((resolve, reject) =>
        this.multer.single(fieldName)(
          ctx.getRequest(),
          ctx.getResponse(),
          (err: any) => {
            if (err) {
              const error = transformException(err);
              return reject(error);
            }
            resolve();
          },
        ),
      );
      return next.handle();
    }
  }
  const Interceptor = mixin(MixinInterceptor);
  return Interceptor;
}
rxjs 가 마구 쓰여서 겁나 어렵습니다.
결과적으로는 거의 따라 구현이 되어버렸습니다..ㅎㅎ
핵심 부분은 intercept() 로 this.multer.single() 에서 파일을 읽어와 Promise를 생성해줍니다. 파일 I/O 는 동기 처리가 되어야 하므로 필수적입니다.
intercept() 의 끝에서 next.handle() 을 해주는데 이걸 해줘야 이후에 실행되어야 할 route handler 를 부를 수 있습니다. Nest 의 Interceptor 문서와 rxjs 의 Observable 문서를 보면 조금 이해할 수 있습니다.
다음은 제가 구현한 FileUploadInterceptor 입니다.
import {
  Injectable,
  NestInterceptor,
  ExecutionContext,
  UnsupportedMediaTypeException,
  PayloadTooLargeException,
  CallHandler,
} from '@nestjs/common';
import { HttpArgumentsHost } from '@nestjs/common/interfaces';
import * as multer from 'multer';
import { FileFilterCallback, diskStorage } from 'multer';
import { Observable } from 'rxjs';

import { MAX_IMAGE_SIZE } from '../../common/constant';

@Injectable()
export class FileUploadInterceptor implements NestInterceptor<void, void> {
  async intercept(context: ExecutionContext, next: CallHandler): Promise<Observable<void>> {
    const ctx: HttpArgumentsHost = context.switchToHttp();

    const multerOptions: multer.Options = {
      fileFilter: (_req, file: Express.Multer.File, cb: FileFilterCallback) => {
        if (!file.mimetype.match(/image\/(gif|jpeg|png)/)) {
          cb(new UnsupportedMediaTypeException('gif, jpeg, png 형식의 파일만 업로드 가능합니다.'));
        }
        cb(null, true);
      },
      storage: diskStorage({
        destination: 'public/img',
        filename: (req, file, cb) => {
          const myId = req.headers['x-my-id'];
          const extArray = file.mimetype.split('/');
          cb(null, 'profile-' + myId + '.' + extArray[extArray.length - 1]);
        },
      }),
      limits: { fileSize: MAX_IMAGE_SIZE },
    };

    await new Promise<void>((resolve, reject) =>
      multer(multerOptions).single('image')(ctx.getRequest(), ctx.getResponse(), (error) => {
        error
          ? reject(
              error.code === 'LIMIT_FILE_SIZE'
                ? new PayloadTooLargeException('이미지 파일은 4MB 이하로 업로드 가능합니다.')
                : error,
            )
          : resolve();
      }),
    );
    return next.handle();
  }
}
기존에 fileFilter 에서 size 검사하던 것을 limits 로 변경한 것 이외에는 같은 로직 입니다. file limit 에러를 따로 처리하기 위해 single() 의 return 값에서 error code 를 따로 체크해줬습니다.
fileFilter 에서 size 를 체크하게 되면 아무리 큰 파일이어도 다 올라간 후 체크를 해야 해서 limits 로 업로드 시점에 (파일 객체가 생성되기 전에) 체크를 해주는 것이 성능상 이점이 있어 채택했습니다.
위에서 언급한 부분을 참고하며 핵심 기능만 추가했습니다. 하지만 재사용이 어려워 보여서 multer option 만 따로 빼는 등의 선택이 나았을 것 같네요..
multer 에 대해 깊이 파보고 rxjs 도 살짝 찍먹해봐서 좋은 경험이긴 했지만 아쉬운 부분입니다!
해당 코드가 적용된 pr 을 보고 싶다면?
https://github.com/GhostPangPang/GhostPong/pull/122
✨ [Feature] image upload api & serve static by jis-kim · Pull Request #122 · GhostPangPang/GhostPong
Summary image 를 POST /user/image 로 업로드하는 기능 업로드 시 backend/public/asset 에 "profile-${userId}.${ext}" 형태로 저장되어 유저당 최대 3개 저장됨 backend/public/asset 에 있는 이미지 파일을 get 할 수 있게 se
github.com