[Passport.js] passport 에서 로그인과 callback route 를 나눠야 할까?
서론
OAuth2.0 을 이용하여 로그인을 개발하던 중..
저는 Nest 가 먹기 좋게 감싸놓은 @nestjs/passport 패키지와 @UseGuard(AuthGuard(`${strategy명}`)) 을 이용하여 편안하게 개발하고 있었습니다.
그 때 동료가 저에게 로그인 프롬프트를 띄우는 경로와 콜백 경로가 같아도 인증이 잘 작동한다는 놀라운 사실을 알려주고 말았습니다. 같은 Guard를 사용하는데도 다른 동작을 한다니??
하나는 외부 로그인 프롬프트를 띄워야하고 하나는 인증된 정보를 받아 처리해야하니 당연히 경로가 달라야겠지 하고 별 생각없이 '/login' 과 '/login/callback' 이라는 두 가지 경로를 만들던 저는 정말 하나로 통일해도 잘 작동한다는 사실을 알고 왜 그런지 궁금해졌습니다..

AuthGuard에서는 무슨 일이 일어나는가?
route handler 에 Guard 를 지정하게 되면 경로에 들어올 때마다 해당 Guard의 canActive() 를 실행하게 됩니다.
@nestjs/passport 패키지의 AuthGuard 의 canActive 는 다음과 같습니다.
async canActivate(context: ExecutionContext): Promise<boolean> {
  const options = {
    ...defaultOptions,
    ...this.options,
    ...(await this.getAuthenticateOptions(context))
  };
  const [request, response] = [
    this.getRequest(context),
    this.getResponse(context)
  ];
  const passportFn = createPassportContext(request, response);
  const user = await passportFn(
    type || this.options.defaultStrategy,
    options,
    (err, user, info, status) =>
      this.handleRequest(err, user, info, context, status)
  );
  request[options.property || defaultOptions.property] = user;
  return true;
}
여기서 createPassportContext()를 들어가보면?
const createPassportContext =
  (request, response) => (type, options, callback: Function) =>
    new Promise<void>((resolve, reject) =>
      passport.authenticate(type, options, (err, user, info, status) => {
        try {
          request.authInfo = info;
          return resolve(callback(err, user, info, status));
        } catch (err) {
          reject(err);
        }
      })(request, response, (err) => (err ? reject(err) : resolve()))
    );
passport.authenticate() 를 Promise 로 감싼 객체를 반환합니다.
이전에 express 와 passport 를 이용해서도 로그인을 구현했었는데, 그 때의 코드와 상당히 비슷합니다.
express 와 42 passport strategy를 사용했을 때의 코드입니다.
  router.get('/42', passport.authenticate('42', { session: false }));

  // return으로 redirect와 동시에 종료
  router.get('/42/return', (req, res) => {
    passport.authenticate('42', { session: false }, async (err, user) => {
      try {
        if (err || !user) throw err;

        await setTokens(res, user);
        res.redirect('/');
      } catch (err) {
        logger.warn(`passport authenticate return :  ${err.stack}`);
        res.redirect('/login');
      }
    })(req, res);
  });
그냥 해당 코드를 쓰기 쉽게 래핑해놓은 것 같습니다.
처음에는 AuthGuard 가 두 개의 동작을 다르게 해주는 줄 알았는데, 그게 아니고 passport 의 authenticate() 가 옵션에 따라 다르게 처리해주는 것 같아 보입니다!
Passport.authenticate() 에서는 무슨 일이 일어나는가?
그럼 authenticate 는 대체 뭘 하는거지..?
궁금해서 42 passport 의 authenticate() 를 까봤습니다.
var OAuth2Strategy = require('passport-oauth2');
var util = require('util');
var Profile = require('./profile');
var InternalOAuthError = require('passport-oauth2').InternalOAuthError;

function Strategy(options, verify) {
  options = options || {};
  options.authorizationURL = options.authorizationURL ||
    'https://api.intra.42.fr/oauth/authorize';
  options.tokenURL = options.tokenURL || 'https://api.intra.42.fr/oauth/token';
  options.customHeaders = options.customHeaders || {};

  if (!options.customHeaders['User-Agent']) {
    options.customHeaders['User-Agent'] = options.userAgent || 'passport-42';
  }

  OAuth2Strategy.call(this, options, verify);
  this.name = '42';
  this._profileURL = options.profileURL || 'https://api.intra.42.fr/v2/me';
  this._profileFields = options.profileFields || null;
  this._oauth2.useAuthorizationHeaderforGET(true);
}

// Inherit from `OAuth2Strategy`.
util.inherits(Strategy, OAuth2Strategy);
...
까봤더니 authenticate 는 없고 Strategy 함수의 정의와 util.inherits(Strategy, OAuth2Strategy); 만 있었습니다.
처음 보는 함수였기 때문에 구글링을 해보니 prototype 을 상속받는 함수였습니다. class와 extend 문법이 생기면서 deprecated 되었습니다. 그렇다면 util.inherits(Strategy, OAuth2Strategy); 의 의미는 42-passport 의 Strategy 가 OAuth2Strategy를 상속받는다는 것입니다.
https://nodejs.org/docs/latest/api/util.html#utilinheritsconstructor-superconstructor
Util | Node.js v21.1.0 Documentation
Util# Source Code: lib/util.js The node:util module supports the needs of Node.js internal APIs. Many of the utilities are useful for application and module developers as well. To access it: const util = require('node:util'); copy util.callbackify(original
nodejs.org
https://www.educative.io/answers/what-is-utilinherits-in-nodejs
Educative Answers - Trusted Answers to Developer Questions
Level up your coding skills. No more passive learning. Interactive in-browser environments keep you engaged and test your progress as you go.
www.educative.io
OAuth2Strategy 는 passport-oauth2 모듈이었습니다.
var OAuth2Strategy = require('passport-oauth2');
그렇다면 42-passport 의 authenticate 는 passport-oauth2 의 authenticate 와 동일할 것으로 생각됩니다.
이제 passport-oauth2 의 authenticate 를 살펴봅시다.
OAuth2Strategy.prototype.authenticate = function(req, options) {
  options = options || {};
  var self = this;

  ...

  if ((req.query && req.query.code) || (req.body && req.body.code)) {
    function loaded(err, ok, state) {
      if (err) { return self.error(err); }
      if (!ok) {
        return self.fail(state, 403);
      }

      var code = (req.query && req.query.code) || (req.body && req.body.code);

      var params = self.tokenParams(options);
      params.grant_type = 'authorization_code';
      if (callbackURL) { params.redirect_uri = callbackURL; }
      if (typeof ok == 'string') { // PKCE
        params.code_verifier = ok;
      }
      self._oauth2.getOAuthAccessToken(code, params,
        function(err, accessToken, refreshToken, params) {
        ...
      });
    });
     ...
    var state = (req.query && req.query.state) || (req.body && req.body.state);
    try {
      var arity = this._stateStore.verify.length;
      if (arity == 4) {
        this._stateStore.verify(req, state, meta, loaded);
      } else { // arity == 3
        this._stateStore.verify(req, state, loaded);
      }
    } catch (ex) {
      return this.error(ex);
    }
 } else {
    var params = this.authorizationParams(options);
    params.response_type = 'code';
    if (callbackURL) { params.redirect_uri = callbackURL; }

	...

	var state = options.state;
    if (state && typeof state == 'string') {
      params.state = state;

      var parsed = url.parse(this._oauth2._authorizeUrl, true);
      utils.merge(parsed.query, params);
      parsed.query['client_id'] = this._oauth2._clientId;
      delete parsed.search;
      var location = url.format(parsed);
      this.redirect(location);
    } else {
      function stored(err, state) {
        if (err) { return self.error(err); }

        if (state) { params.state = state; }
        var parsed = url.parse(self._oauth2._authorizeUrl, true);
        utils.merge(parsed.query, params);
        parsed.query['client_id'] = self._oauth2._clientId;
        delete parsed.search;
        var location = url.format(parsed);
        self.redirect(location);
      }

      try {
        var arity = this._stateStore.store.length;
        if (arity == 5) {
          this._stateStore.store(req, verifier, state, meta, stored);
        } else if (arity == 4) {
          this._stateStore.store(req, state, meta, stored);
        } else if (arity == 3) {
          this._stateStore.store(req, meta, stored);
        } else { // arity == 2
          this._stateStore.store(req, stored);
        }
      } catch (ex) {
        return this.error(ex);
      }
    }
  }
}
 ...
코드의 일부만 빼오느라 괄호 갯수나 indent 가 안맞을 수 있습니다..
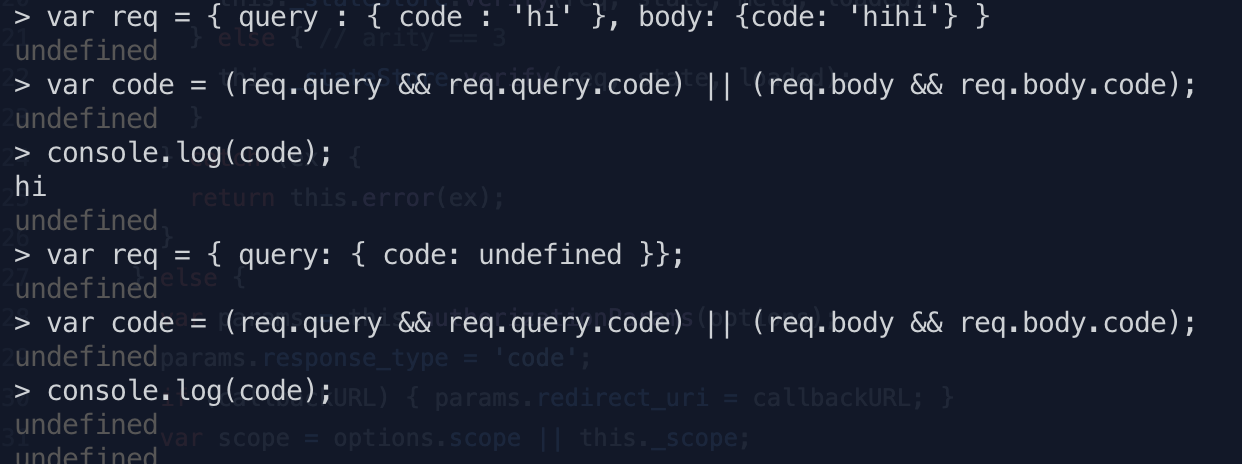
authenticate 에서 가장 큰 분기는 if ((req.query && req.query.code) || (req.body && req.body.code)) { ... } 인데, req.query.code 나 req.body.code 값이 있다면 code 값이 조건문에 들어가므로 if문이 실행됩니다. 반대로 둘 다 없다면 undefined 가 되므로 else 로 넘어갑니다.
if문 안에서는 code 를 추출한 후 loaded 를 선언해 마지막에는 this._stateStore.verify() 를 호출합니다.
여기서 _stateStore 는 Strategy 를 만들 때 매개변수의 options.store 값에 따라 달라집니다.
그 중 하나인 PCKESessionStore 에 가보면 verify() 도 있고 store() 도 있습니다. 아무튼 code 값이 있으면 verify() 로직을 호출하는 것 같네요!
code 값이 존재하지 않는 else 에서는 self.redirect(location) 를 호출하게 됩니다. location 은 잘 찾아보면 Strategy의 options.autorizationURL 을 가공한 값인데, autorizationURL 은 passport 의 Strategy 마다 달라집니다.
예를 들면 passport-google-oauth2 의 값은 options.authorizationURL=options.authorizationURL || 'https://accounts.google.com/o/oauth2/v2/auth';이고, passport-42 의 값은 options.authorizationURL=options.authorizationURL || 'https://api.intra.42.fr/oauth/authorize'; 입니다. 즉 대상 인증서버의 로그인 프롬프트 url 입니다.
오.. 어디서 많이 봤습니다.......
어라? 익숙한데?
oauth 로그인을 테스트 하다보면 자주 보는 형태가 있습니다.

인증 서버에서 유저가 로그인을 완료하면 Strategy option 으로 지정한 callbackURL 으로 요청이 오게 되는데 이 때 query string 으로 code 값이 붙어옵니다.
passport.authenticate() 에서 추출되는 code 값이 이 값과 동일해 보입니다.
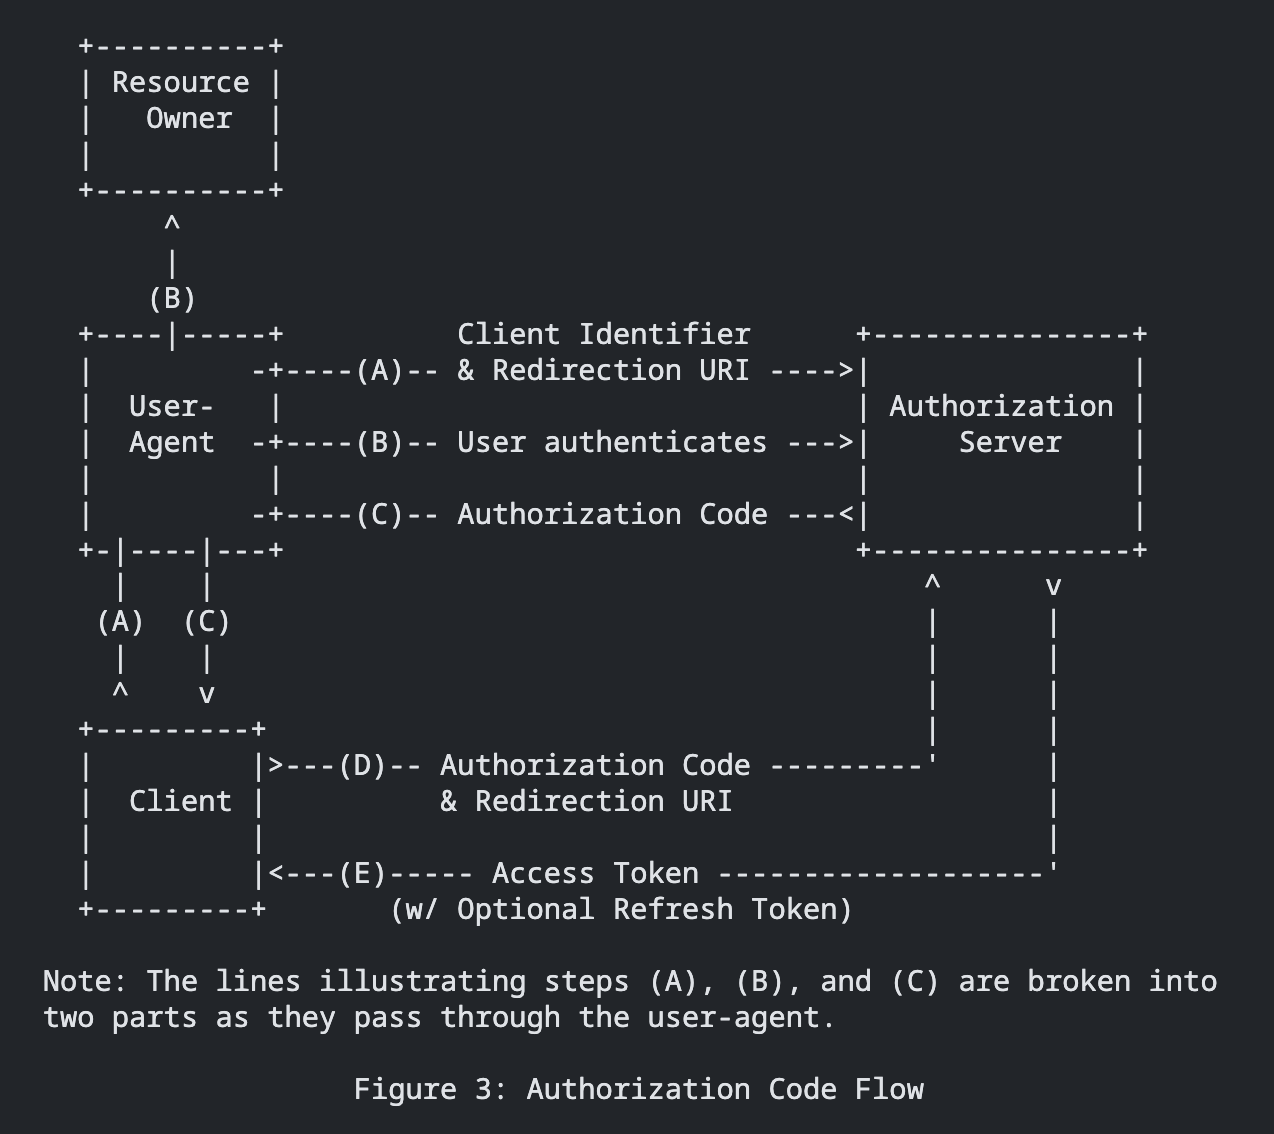
여기서 verity() 내부가 D~E 에 해당하는 것 같습니다.
https://www.passportjs.org/concepts/oauth2/authorization/
Understanding OAuth 2.0: Authorization
Requesting Authorization The OAuth 2.0 protocol flow begins when the application requests authorization from the user. The authorization request is typically triggered based on the user taking an action. In the case of Facebook, such an action would be the
www.passportjs.org
글을 작성하다 발견한 passport 의 oauth2 문서가 생각보다 친절합니다.....!
passport 문서와 oauth rfc 를 참고했을 때
인증 서버로 redirect -> 유저의 인증 -> code 를 어플리케이션에 반환 -> code 로 다시 인증 서버에 token 요청 -> 토큰 발급 -> 발급한 토큰으로 필요한 정보 요청 (profile 에 들어오는 정보들) 까지 passport 로 간편하게 처리할 수 있다는 것을 알 수 있었습니다.
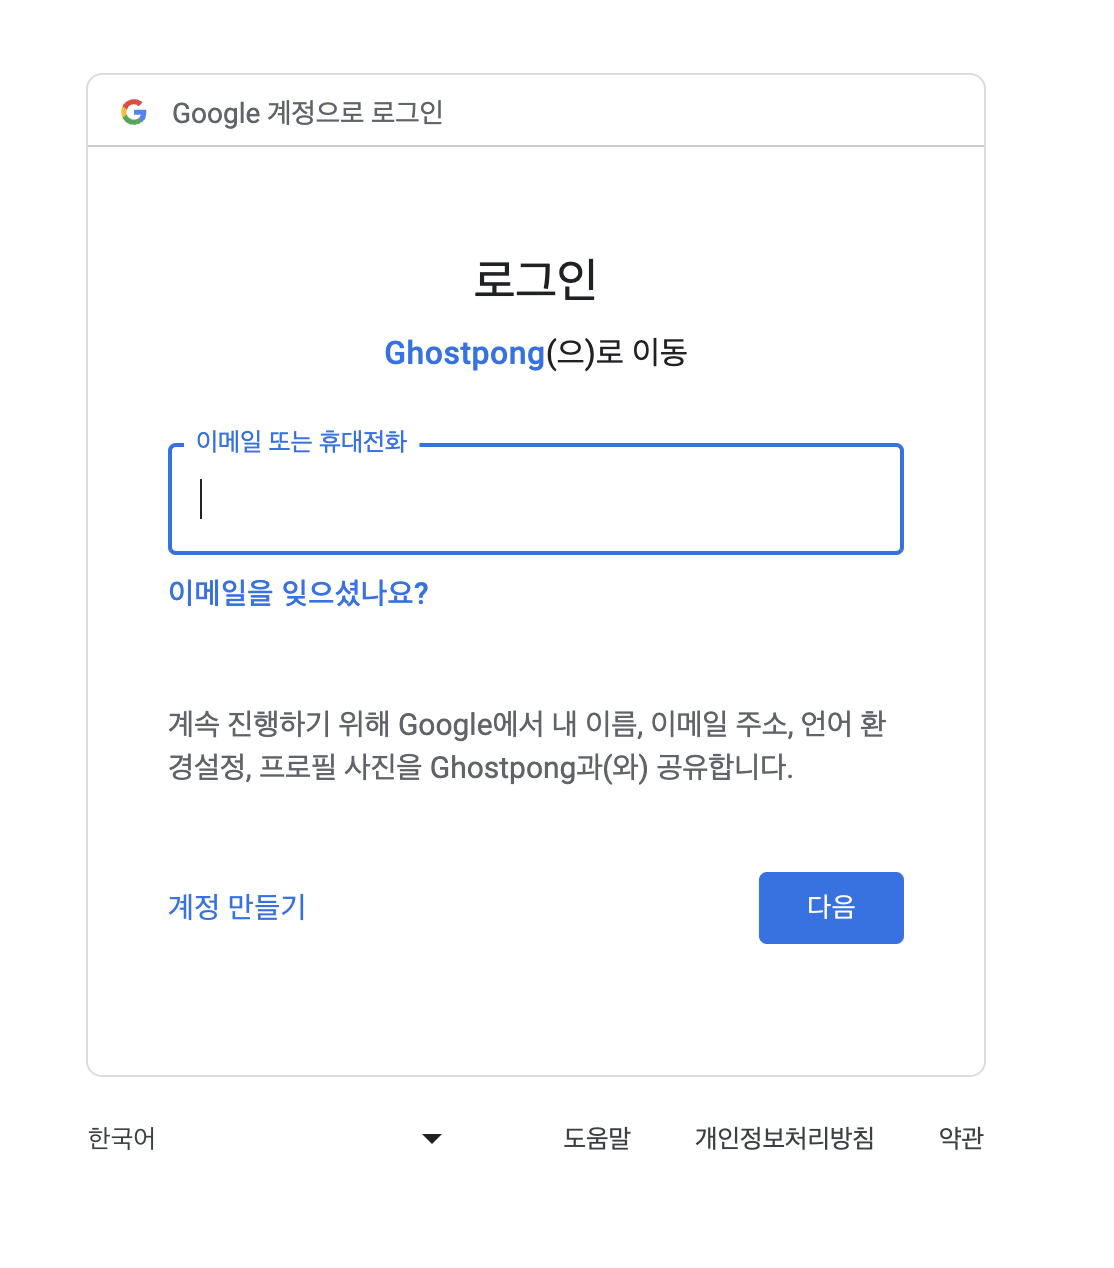
또 맨 처음 redirect 되는 로그인 프롬프트의 url 을 살펴보면

아까 else 문에서 redirect했던 주소와 동일합니다.
진짜 하나로 처리 되나 테스트
express 와 passport 로 간단한 앱을 하나 만들어 봅시다.
express init 후 index.route 에 다음 코드를 작성했습니다.
var express = require('express');
var router = express.Router();
var passport = require('passport');
var GoogleStrategy = require('passport-google-oauth20').Strategy;

passport.use(
  new GoogleStrategy(
    {
      clientID: ... ,
      clientSecret: ... ,
      callbackURL: 'http://localhost:3000/api/v1/auth/callback/google',
    },
    function (accessToken, refreshToken, profile, cb) {
      console.log(profile);
      return cb(null, profile);
    }
  )
);

router.get(
  '/api/v1/auth/callback/google/',
  passport.authenticate('google', { scope: ['profile'] }, () => {
    console.log('callback');
  })
);

module.exports = router;
전에 사용하던 프로젝트를 재사용해서 URL이 깁니다ㅎㅎ... 다시 설정하기 귀찮아서 그만.....
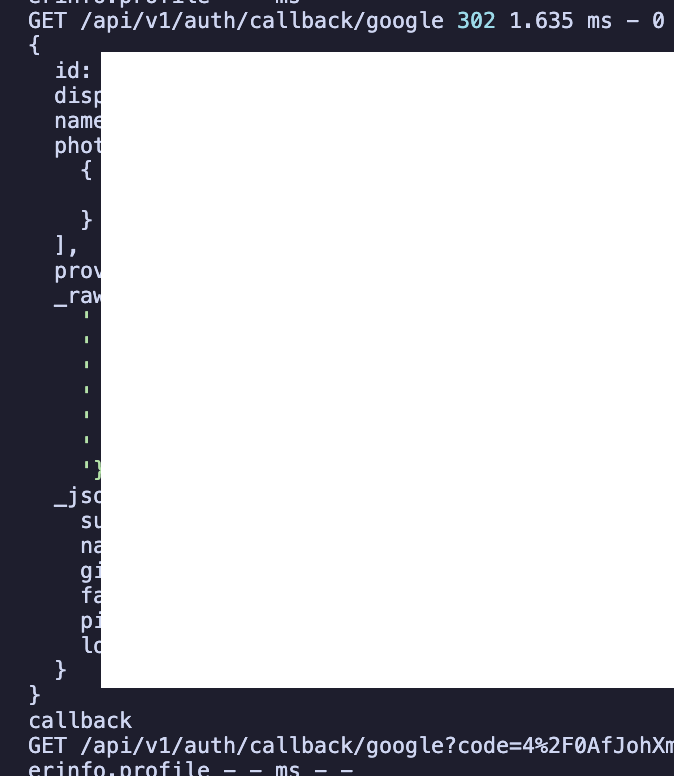
해당 path 로 요청 결과 예상대로 리다이렉션 -> 콜백 모두 한 route 에서 이루어 지는 것을 알 수 있습니다.
code 로만 구분이 되는지 테스트 하기 위해 이번에는 다른 Nest 앱에서 @UseGuard(AuthGuard) 가 붙는 route 에 curl 로 요청을 날려보았습니다.
1. code가 없는 get 요청
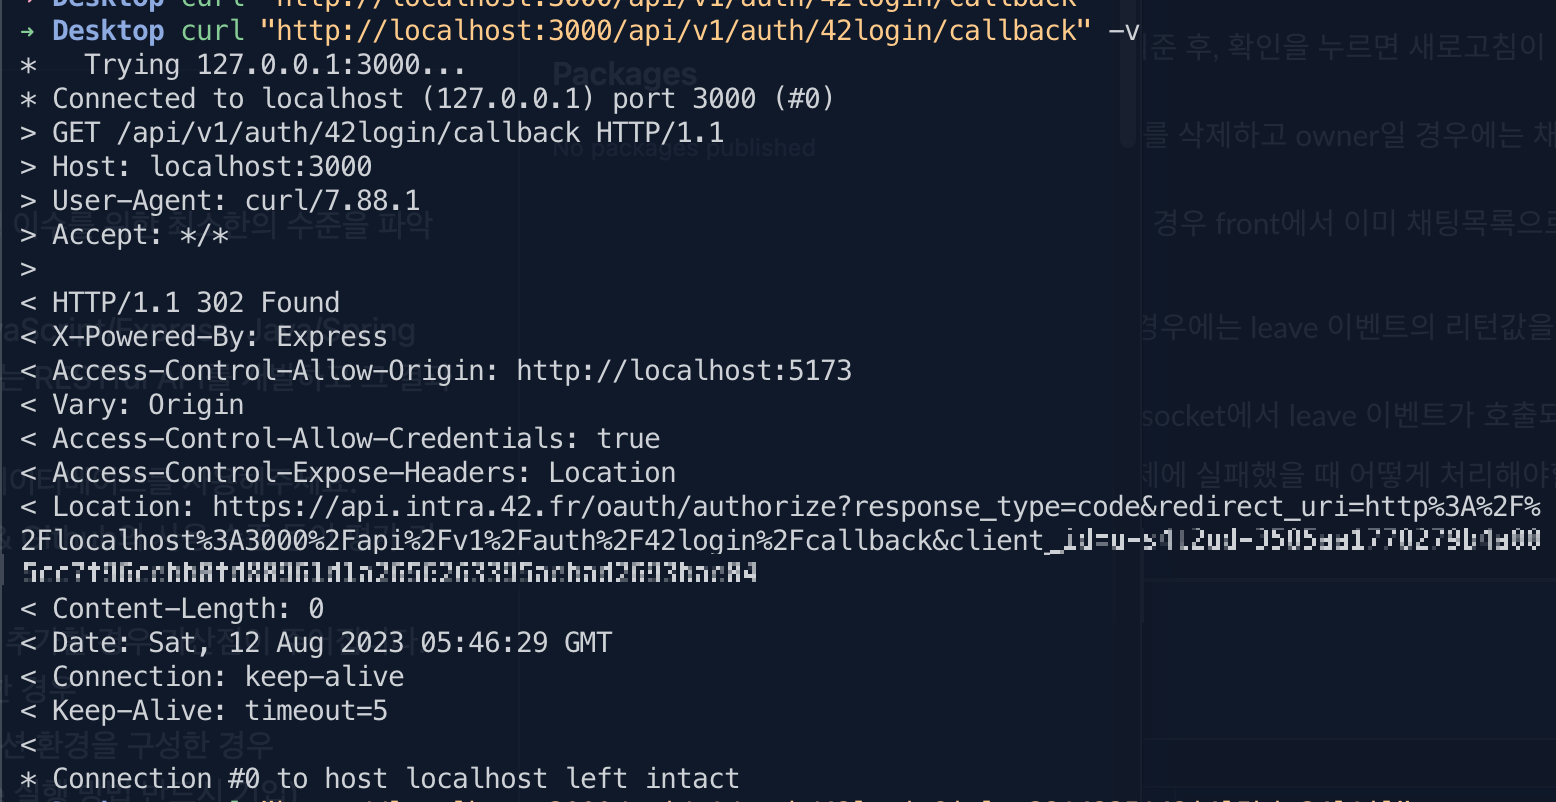
인증 서버로 리다이렉션 됩니다.
2. code가 있으면서 유효하지 않은 요청
일부러 code 를 아무값이나 줘봤습니다.
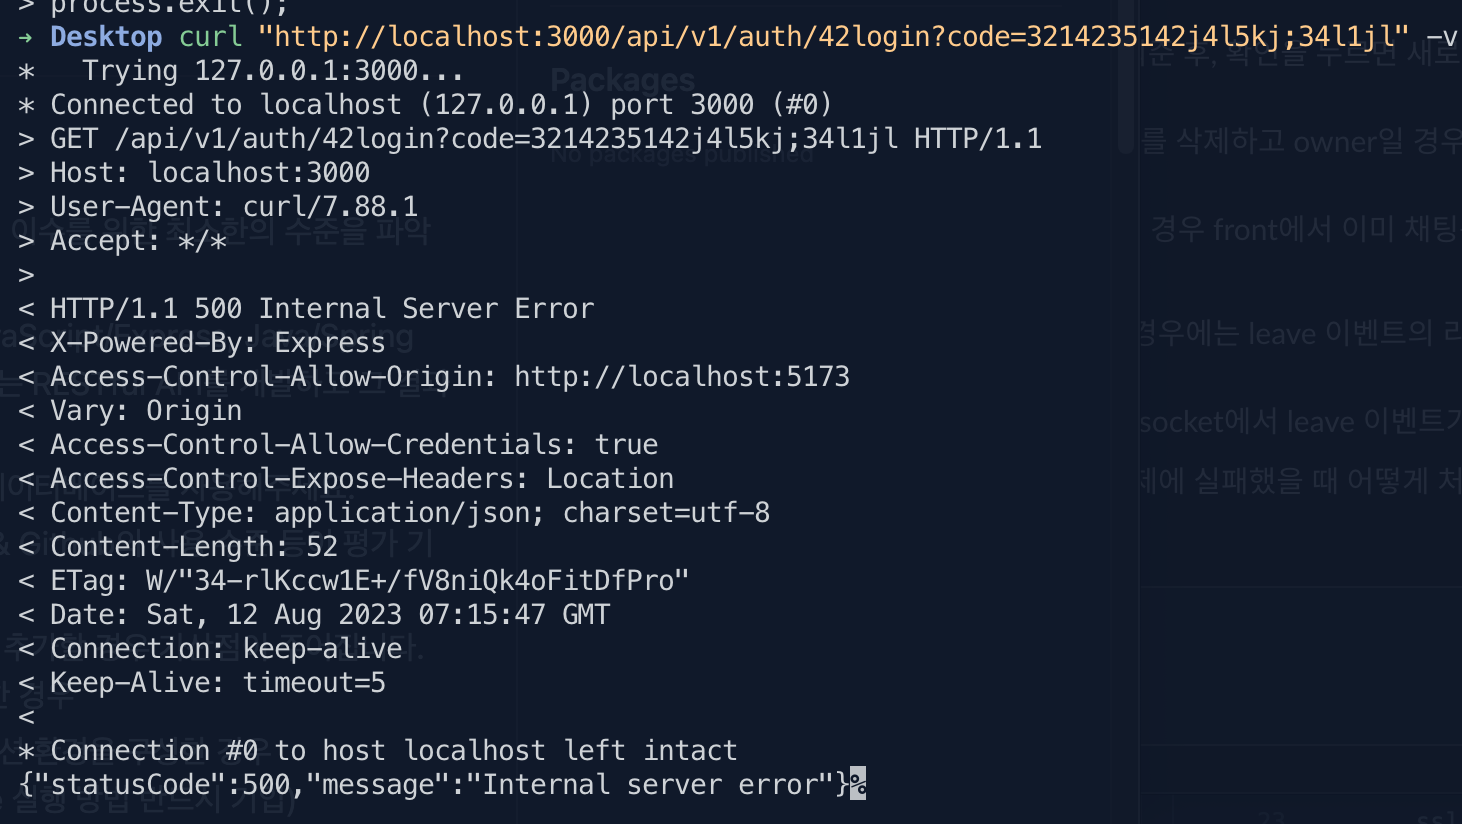
500 에러의 response 가 옵니다. code 값을 검증하러 갔다가 에러가 난 모양입니다.
https://datatracker.ietf.org/doc/html/rfc6749#section-4.1.2
RFC 6749: The OAuth 2.0 Authorization Framework
The OAuth 2.0 authorization framework enables a third-party application to obtain limited access to an HTTP service, either on behalf of a resource owner by orchestrating an approval interaction between the resource owner and the HTTP service, or by allowi
datatracker.ietf.org
OAuth 2.0 RFC 에서 인증 서버의 응답 중 code가 필수였기 때문에 code의 유무로 클라이언트의 인증 요청인지, 인증 서버의 code 포함 응답인지가 구분될 수 있던 것 같습니다.
결론!
두 개를 구분짓지 않아도 passport 가 잘 구분지어서 요청해줍니다.
하지만 예시 코드도 나뉘어 있고 세상 많은 사람들이 둘을 구분지어 쓰기 때문에 실제로는 구분하여 구현했습니다.
passport 가 많은 처리를 해주는 편한 라이브러리라는 것이 잘 느껴지는 여정(?)이었습니다. 정보성 글이라기보다는 호기심 해결을 위한 글이지만... 재밌었으면 된 거 아닐까요? 전 재밌었습니다.....! 👍